Thursday, November 15, 2012

Completing the Turkey Trot Costume

In order to complete the Turkey Trot costume, I needed to finish my shirt.  

Materials

  • 1 brown t-shirt
  • 1 piece of felt in various colors (shown here: orange, crimson, red, and yellow)
  • 1 piece of cardboard to create stencils
  • needle and threat (or sewing machine)

How to: 

I started with the back design (flared feathers to look like the turkey tail).  Draw a feather like image onto your cardboard.  Cut it out and retrace desired number of feathers onto your felt. 


Cut out all of your traced feathers.  Arrange your design so you know how the pieces will line up. 

Stitch the design onto the back of your shirt.  


Here is what the back of my shirt looks like on:


Next I wanted to create a bib of feathers around the front collar.  I traced circles onto the remaining felt (but forgot to take pictures of this part).  Then I stitched them onto the front.  

Now that my shirt is complete, I tried on the full outfit.  It's hard to take pictures of yourself and I promise it is much cuter in person, but I love it! 


Wednesday, November 14, 2012

Turkey Tutu

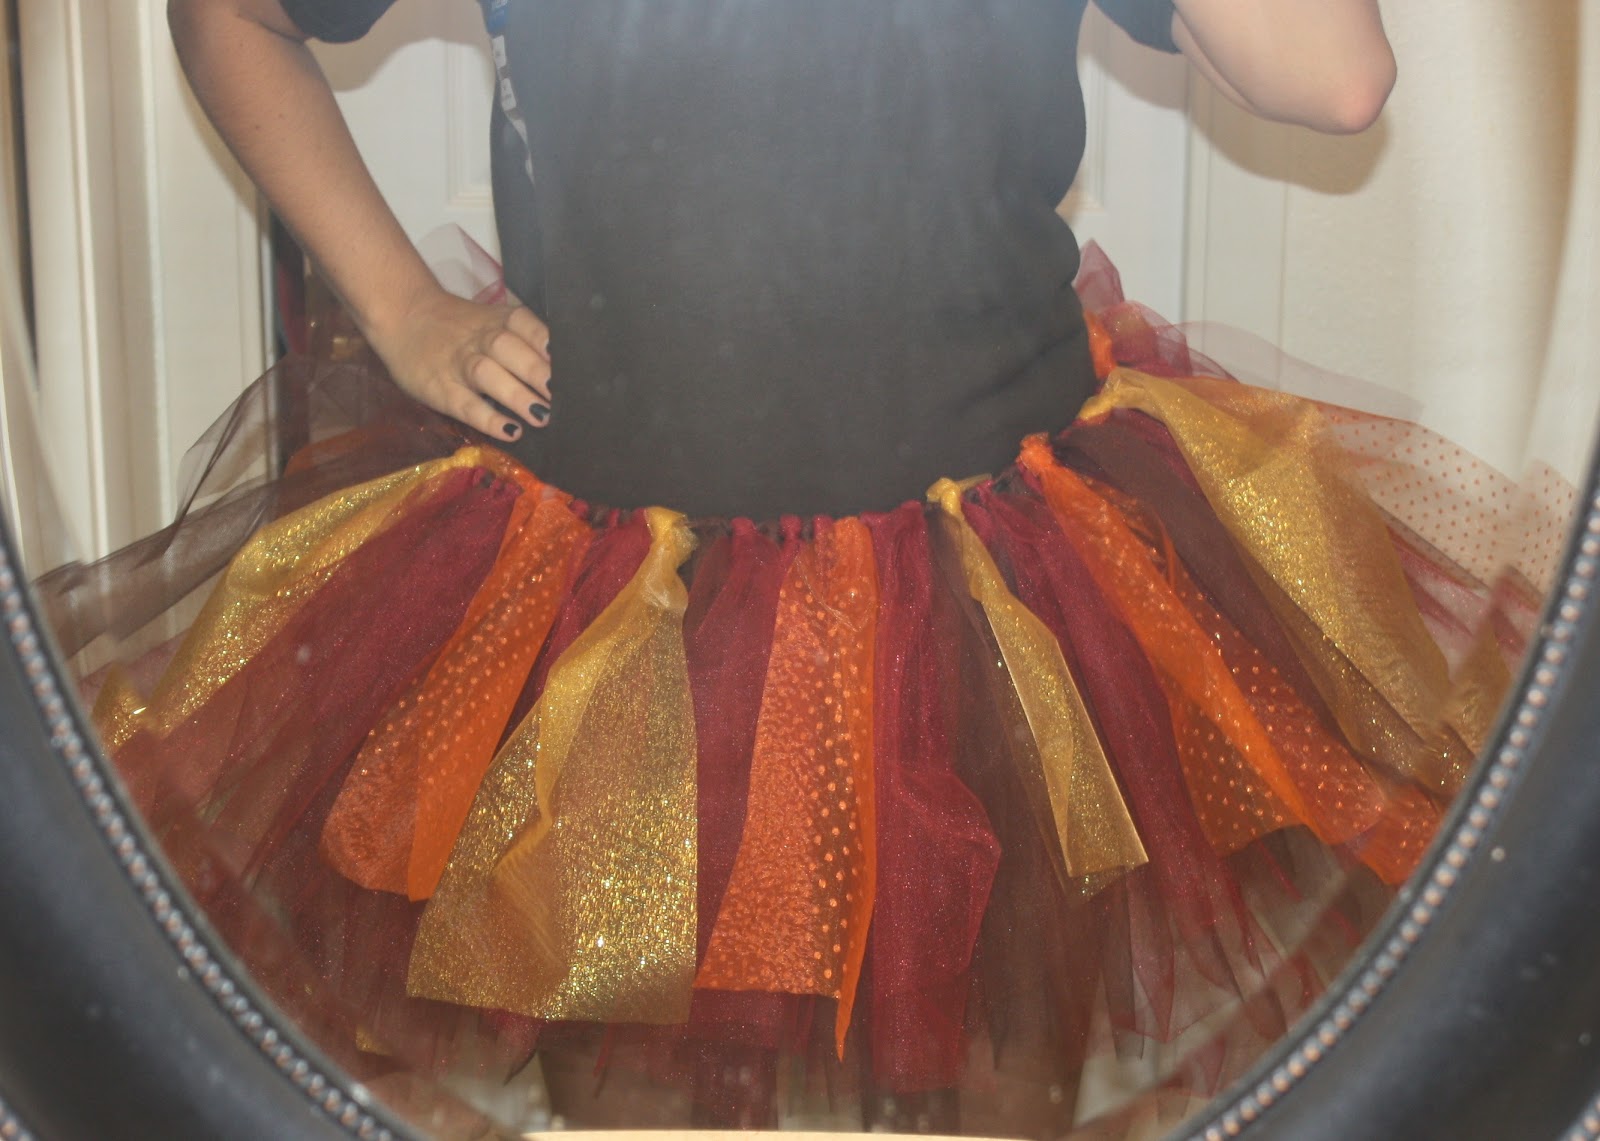
For the first time I will be running a Turkey Trot!  And I am over the moon about it.  Having wanted to do this for a while I know the best part of this festive 5k: the costumes!  After a quick Google search it seems that turkey tutus are all the rage at these events.  I happen to have tulle left over, but I picked up a few new rolls just in case (and I was glad that I did!).  

Materials

  • 1 roll of plain brown tulle (25 yards)
  • 1 roll of plain crimson tulle (25 yards)
  • 1 roll of yellow tulle with glitter tulle (10 yards)*
  • 1 roll of orange tulle with glitter tulle (10 yards)*
  • ribbon (at least 2 yards -- you will measure this to fit you)
* yellow and orange will be your accent colors over the brown and crimson base, that's why you need significantly less. 

How to:

Start by measuring the ribbon.  Remember a tutu fits around your hips, not your waist.  Wrap the ribbon around your hips and add 6-8 inches on each end (these will allow you to tie the tutu around yourself).  Cut the brown and crimson tulle into 24 inch strips.  I used both spools completely.  Start your tutu using a single piece of tulle strip.  Create a loop, wrap it around the ribbon, then pull the loose tulle ends through the loop.  


Continue this process alternating brown and crimson.  Continue all the way around the ribbon, leaving the ends for tying.  This will be your base.


Now cut 8 strips of yellow and orange tulle each.  These are your accent colors.  Loop them in sporadically along the ribbon.  


Test out the final product to make sure it fits and that you have tulle all the way around.  You don't want a bald spot!  I then tried my turkey tutu on with my brown t-shirt.  I will be making the t-shirt festive too, but for now I wanted to see how it would pair with the tutu.   


I LOVE the final product!

Tuesday, November 13, 2012

thankful for tulle

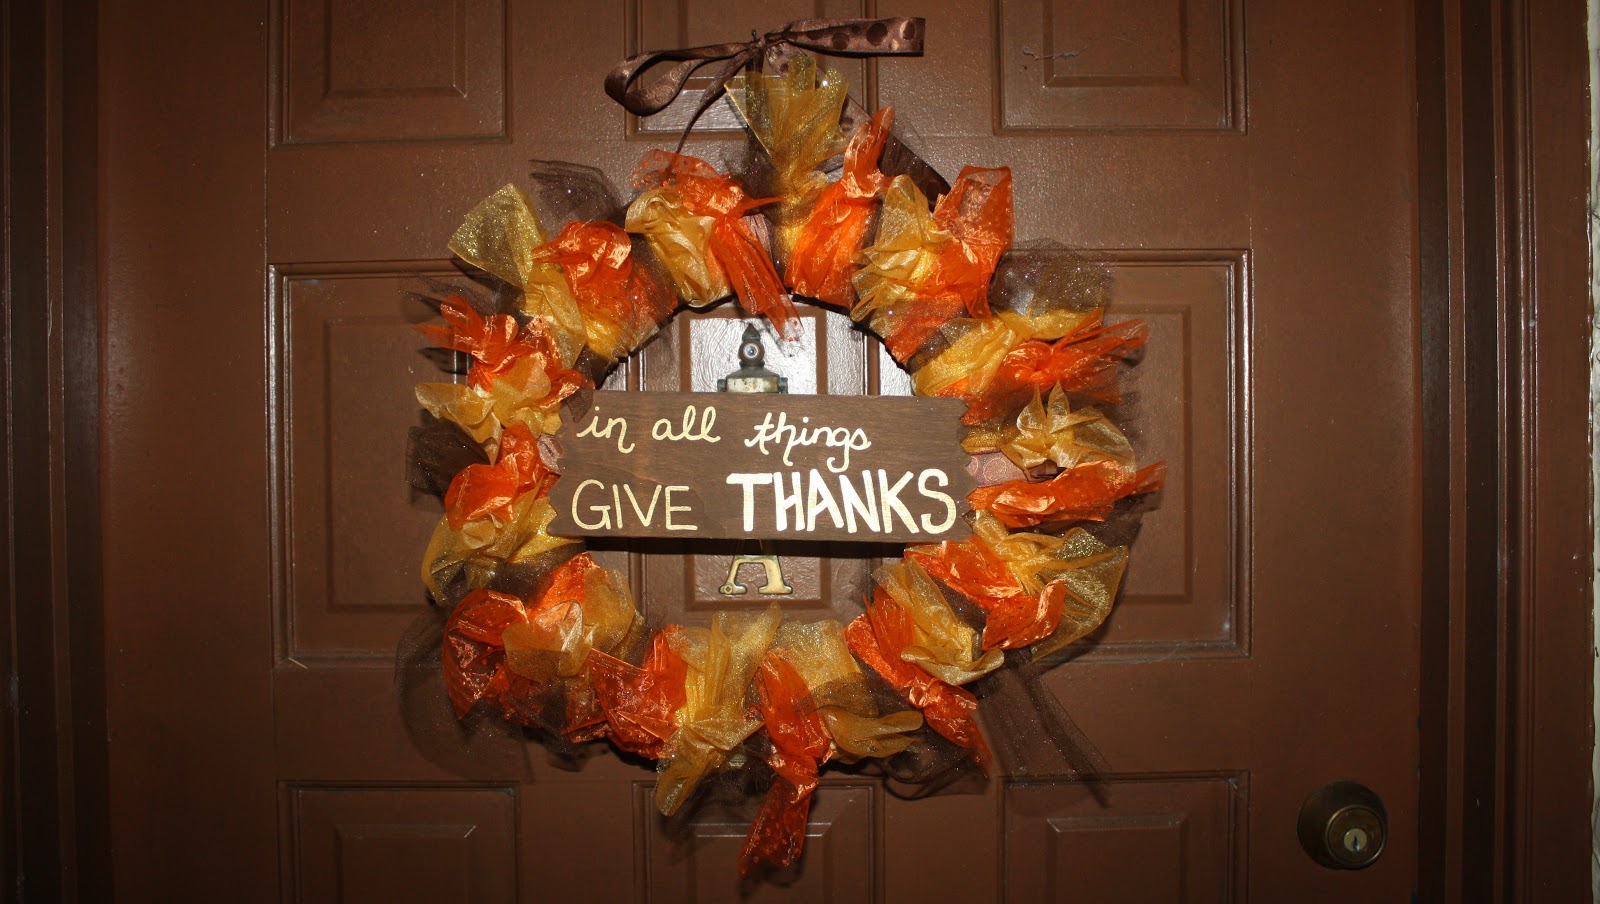
I am hosting Thanksgiving!  First year back in the Sunshine State and I get to host the family (minus Rick).  That means I have one week to get ready.  Naturally a wreath is in order.  I'm been wanting to play with tulle and this was the perfect excuse.
Materials
  • tulle (12 yards) in desired color(s) -- I used a sheer chocolate with light glitter, a solid yellow with excessive gold glitter, and a ribbed orange with dotted glitter (I like the variety of textures)
  • 1 wreath at desired size (straw wreath proved to be MUCH cheaper than floral wreaths)
  • brown ribbon
  • 1 wooden panel for message
  • brown paint
  • gold paint pen


How to: 

Start by cutting the tulle into strips.  I cut 24-inch pieces (12) of each of my colors.   

Fold the piece in half.  Keep a hold of the loop.  Wrap the tulle around the wreath and bring the loose ends through the loop.  Then flare out the ends. Continue on all the way around the wreath. 

When completed be sure to flare out all of the loose ends.  


Paint the wooden panel using the brown (or other desired color) paint.  Use the paint pen to write your own message.  Attach (tape) ribbon to the back of the panel with ends long enough to tuck into some of the tulle wraps on the wreath -- this will secure your message to the wreath.  


Add ribbon to hang the wreath and tie a bow at the top for charm.  And there's your festive wreath!


Saturday, October 20, 2012

I'm a mouse, duh!

Orlando had a downtown Halloween themed pub crawl.  So I needed a costume...quick!  I didn't want something complicated and I didn't want to spend a lot of money.  Mean Girls was on tv several times last week...

And thus I decided to become a MOUSE!

I already had the grey dress.  I just needed the ears.  (I opted out of the tail because it could be a hassle and I didn't want to look like a rat.)  I looked at Target, the Dollar Store, and Walmart.  None of them had a cute ear set, so I decided to make some ears.  

Materials
  • 1 piece of grey felt (shade to match the dress) and 1 piece of pink felt
  • 1 piece of cardboard
  • 1 circle (you will use this to create the size of your eyes)
  • grey string and a needle
  • scissors
  • marker
  • bobby pins (6)
How to: 

Using your circle, trace 2 circles on the piece of cardboard.  Then cut them out.  These cardboard pieces will provide sturdiness to your ears.

Cut out 2 small squares from the pink felt, roughly the same size as your circles.  These will be the pink insides of your ears. Fold one square in half.  Draw a half heart.  Then cut along the line.  Unfold and you will have a heart.  It doesn't have to be perfect, just however you want it.  Use that first heart to trace a matching second heart.


Double check that your hearts fit inside your circles. 
Now we will focus on the ears.  Face your piece of grey felt face down if it has texture like mine did; this will hide your drawing marks.  Place down one circle onto the felt (textured side down).  You will want to draw around the circle.  Leave a 1/4 inch space between your cardboard circle and the line; this space will allow for your stitching.  Then you will draw an added 1 1/2 inch of rectangle at the bottom.  This will form the loop for your bobby pin to go into.  Cut out your drawing.  Use it to trace 1 more.  These two version will be the front flaps of your ears.  Then flip over your drawings and trace twice more; these will be the backs of your ears.  This will make sure your ears match.  Cut out the remaining drawings.  Then line everything up.  


I then hand stitched a pink heart onto the front panel of each ear. Since this is a front panel you want to be sewing directly onto your textured side.  (I liked the hand stitched look and could do this while watching tv.  Using a sewing machine this project would take less than ten minutes.)


Then line up your ears, one at a time: front panel, cardboard circle (sturdiness), then back panel (textured side facing out).  Start on one end and stitch all the way around.  Place in a bobby pin to allow enough room in your loop.  Stitch the end of your panel up to the top (over the bobby pin), thus creating a loop.  Continue for the second ear.  (I used bobby pins because I don't like headbands, but you could usually slip the loops onto a headband for a youngster.)


Your ears are complete! (Use more bobby pins to secure them in place.)


Here's what they look like on:


Happy costume creating!

Thursday, October 18, 2012

making whoopie...pies


Love red velvet? Of course you do.  Here's an interesting twist on the classic combined with a childhood favorite.  These treats are easy to make and can be created for big hands or little ones.  

Ingredients
  • 1 box of red velvet cake mix
  • 3/4 cup of water
  • 1/2 cup of vegetable oil 
  • 3 eggs
  • 1 box (4-serving size) instant chocolate pudding mix
Heat oven to 350 degrees.  Grease baking sheets.  In a large bowl, mix all of the ingredients until a smooth batter.

Pour batter in a plastic resealable bag.  Seal baggie and push batter to one corner.  Cut corner to create a small hole. 


Pipe batter into small circle (this will desire how big you want your pies), about 1-inch apart to allow for spreading. 


Bake 10-12 minutes.  Cool 2 minutes then place on a cooling rack.  Make sure to cool completely before filling.  

Once cooled, spread frosting on the flat side of one cookie.  Top with a second cookie, flat side down to make a sandwich.  
 

 Enjoy!