Thursday, August 11, 2011

Southern sweetness...in my mouth

I love some Southern sweetness...especially in my mouth. Luckily, the Pioneer Woman (yes, her again) had a great recipe which she got from Steel Magnolias, a good chick flick about the women in a Southern town (which I finally watched in full this weekend, but now I digress). This yummy goodness is as easy as its name: a cuppa this, a cuppa that, another cuppa, and bake! I present to you the Cuppa Cuppa Cuppa Cake.

I hope you enjoy this as much as I enjoy all things Southern.

Ingredients:

  • 1 cup of self-rising flour

  • 1 cup of sugar

  • 1 can of fruit cocktail eith the juice

  • softened butter to grease pan

  • Cool Whip for topping


Preheat the over to 350 degrees. Stir together the flour, sugar, and fruit cocktail (including the juice). Pour into a buttered pan.


Bake for 45 minutes. The cake will be a perfect golden color, just like any Southerner. A cut into the cake will show you the yummy goodness inside. Pair with a scoop of Cool Whip and enjoy!


Monday, August 8, 2011

Beam...it's what's for dinner!

What's a hungry girl to do when the main ingredient in my kitchen is a handle of Jim Beam? Use it to make dinner naturally.

I stole this recipe from the Pioneer Woman (check her out if you haven't already). It seemed like a perfect fit. It was quick and easy and makes a large batch. Enjoy!

Ingredients:


  • 24 ounces sliced mushrooms (baby portabellas work well)

  • olive oil

  • kosher salt

  • black pepper

  • 2 tablespoons butter

  • 1 whole large white onion, peeled and sliced

  • 1 3/4 cups of whiskey (Beam works well)

  • 1 cup heavy cream

  • 12 ounces pasta
Cook 12 ounces of pasta.


Preheat oven to 375 degrees. Slice 24 ounces of mushrooms. Drizzle with olive oil, then sprinkle with salt and pepper. Roast for 20 to 25 minutes. Set aside.


In a large pot, heat olive oil along with the butter over medium heat. Throw in the sliced onions and saute for a couple of minutes.


Pour in the whiskey and allow to bubble for a minute or two.


Whiskey bubbles (in case you were wondering):


Pour in broth and allow the liquid to reduce for a couple of minutes.


Stir in cream and reduce to low heat. Add mushrooms, salt, and pepper, and simmer until sauce thickens.


Toss in the cooked pasta.
Voila! Here is the delicious result:


Verdict: very yummy and pairs nicely with Sam Adams Coastal Wheat.

* Note: this is probably not a child appropriate meal.

Sunday, August 7, 2011

Lollipopping 101

Last week Morgan asked me to help her with lollipops for a bachelorette party. I had never made lollipops. It turns out that they are fun and easy to make! This past week, Ben pointed out that I had posted a blog since January...oops! So, here's a new post all about making lollipops.


How does one make lollipops? Simple! First, head to the craft store. Michael's had a good selection, but Hobby Lobby has a fantastic selection of supplies. You will need to buy a candy mold, chocolate melts, and lollipop sticks. This is a cheap and easy project. If you want, you can buy little treat baggies and ribbon if you want these pops to go.

Sidenote: Hobby Lobby has a large selection of candy molds (hearts, stars, animals, bridal themed, sports, etc.). They also have a wide assortment of colors for the chocolate melts.


First pour about 25 of the chocolate melts into a microwave safe container. Set for 30 seconds. Use a spoon to mix the chocolate melts. It will form a nice chocolatey liquid.


Scoop a dollop of the melted chocolate into each mold. It doesn't have to be perfect. Once all of your molds are filled, tap the entire tray on the counter. This will help the chocolate fill each crevice of the mold. It will also prevent bubbles in your final product. Add a stick to each.


Stick the mold tray in the fridge and let sit for at least 15 minutes.


When you remove the mold tray, tap it lightly on the coutner. The lollipops will be easier to remove. They should pop out easily.


Add a treat baggie and ribbon, if desired.


The color choice of the pops in this blog post are no mistake. Next weekend there is an alumni of Florida universities of event. Attendees were asked to bring something to share. I will be bringing about 100 orange and blue lollipops. The display will be the best part. I will post picture once it is done. Bring on football season! :)

Tuesday, January 11, 2011

snow white and apple chips!

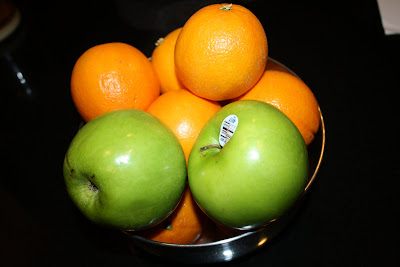
The snow has been falling all evening. In a fit of productivity and cleaning it occurred to me that I need to make use of the produce I have. Particularly the two granny apples that I have in my fruit bowl. I'm also craving something sweet that won't add 15 pounds to my waist. The result is an attempt at making apple chips. Sounds easy enough, right?

This recipe is courtesy of the PurpleFoodie.com and simple to follow.

Ingredients:

  • 2 apples
  • 2 tbsp of sugar
  • 1/2 of cinnamon
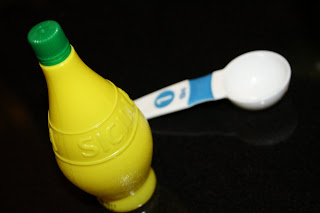
  • 1 tbsp of lemon juice
  • 1 cup of very cold water

Directions:

1. Set the oven at it's lowest setting 170 degrees F.

2. Fill a bowl with the water and lemon.

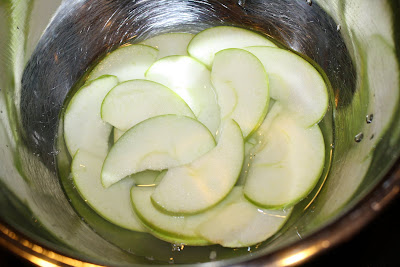
3. Slice the apples (removed seeds and core), placing the slices immediately into the water-lemon mixture. This will prevent your apples from turning brown.

4. Shake off the excess water and place the apple slices on a baking sheet.

5. Combine the sugar and cinnamon. Then sprinkle the mixture over the slices.


6. Put into the oven and bake for 2 hours. Add an hour as necessary, depending on the width of the slices.

Sunday, January 9, 2011

butternut squash and apple soup

It's cold outside! I think a new soup would be perfect. After scanning FoodNetwork.com I came across a butternut squash and apple soup that looks yummy and easy.

Ingredients:

  • 2 tablespoons unsalted butter
  • 2 tablespoons olive oil
  • 3 large yellow unions chopped
  • 2 tablespoons mild curry powder
  • 5 lbs. (2 large) butternut squash
  • 4 McIntosh apples
  • 2 teaspoons kosher salt
  • 1/2 teaspoon fresh ground pepper
  • 2 cups of water
  • 2 cups or apple cider or juice

Directions:

1. Peel the squash, cut it in half, and remove the seeds. Cut the squash into chunks.

2. Peel, core, and quarter the apples.


3. Warm the butter, olive oil, onions, and curry powder in a large stockpot uncovered over low heat for 15 to 20 minutes, until the onions are tender. Stir occasionally, scraping the bottom of the pot.

4. Add the squash, apples, salt, pepper, and two cups of water to the pot. Bring to a boil, cover, and cook over low heat for 30 to 40 minutes, until the squash and apples are very soft.


5. Puree your soup. This would work best in a food processor, which I don't have, so I used blenders. Luckily I have two!


6. Pour the soup back into the pot. Add the apple cider or juice. Mix soup and serve hot.
Enjoy!

Wednesday, December 29, 2010

finding ways to stay warm

Cold weather warrants a warm meal and a new scarf!


Tonight Chef Lucky treated us to dinner including arepas and picadillo. The aroma brings back memories of childhood and the food fills your belly with goodness. There were big helpings and plenty of left overs. The recipes for both are very "shit-it-in" and not exact, with creativity being rewarded in flavor. Inquiring minds should...ask Lucky!


Also on tonight's agenda was the finishing of a new scarf. Morgan suggested that I play with color more. Using various yarns and fun colors, I was inspired to change the pattern of so many other scarves in my closet. The result was this fun new garment that could be perfect for staying warm in the Andes or strolling down the Pride parade. Either way, the colors are fun and it will be sure to keep me warm this spring!

Pattern:
  • This is a basic ribbed pattern: knit 2, purl 2, knit 2, purl, continuing on for 360 stitches. This will create the length of the scarf.
  • Begin with one color, using the basic ribbed pattern, continue for 10 rows.
  • Begin new color, leaving a little extra of first color to be sewn in later.
  • Add as many colors as you want, in this case I chose 4.
  • After you are done, be sure to weave in the extra length of each color. Doing this will prevent you from having to make unsightly knots and will prevent the scarf from unraveling later. It will also make friends like Kelli happy that I learned and listened!

Monday, December 27, 2010

Momma knows best...and how to cook chili!

Momma surprised me with a visit to DC for the holidays! Hooray! Unfortunately, she had to return home, but before she did she made a batch of chili for all.


Ingredients:
  • 2 cans (16 oz. each) of dark red beans

  • 2 cans (16 oz. each) of light red beans

  • 2 cans (16 oz. each) of diced tomatoes (mix and match on your preferred additional flavors)

  • 1 pound ground chicken

  • 1 large white onion, diced

  • 1/2 tsp of garlic

  • 1/2 tsp of ground cumin

  • salt and pepper to taste

Directions:

  1. Cook meat in a skillet.

  2. Combine meat, beans, tomatoes (drain 1 can before adding to mix), onion, garlic, cumin, salt, and pepper into the crockpot.

  3. Turn crockpot onto high for 6 hours.


Serving:

Add shredded cheddar cheese on top of a served bowl of this chili. Can also be paired with tortilla chips for a chicken tortilla chili!